
Let's chat about a room that's basically the heart and soul of any home – yup, you guessed it, the kitchen! This is where the culinary magic happens and where those taste bud dances go down.
But, real talk, life isn't all rainbows and unicorns, and neither is our beloved kitchen, right?
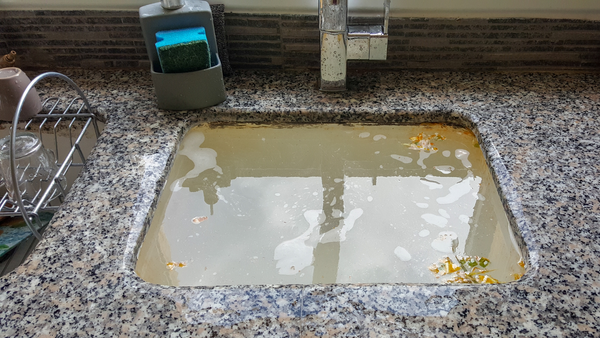
Imagine this scene: you're in the middle of creating a culinary masterpiece, and suddenly, boom, the sink decides to throw a little tantrum. Been there, done that, right?
Fear not, because here's the interesting thought: you don't need to be a plumbing guru to save the day. Most of those sink hiccups? You've totally got the skills to tackle them, without needing to dial up the experts.
We put together some diagnostic steps for possible kitchen sink-breaking scenarios and how you can easily clear those hiccups with simple tools.
Different Possible Scenarios That Can Cause the Kitchen Sink Break
Without diagnosing the situation, you will find it hard to resolve the problem. There are a handful of parts in the kitchen sink that can cause trouble.
Understanding the different parts of the sink can greatly help you assess the situation.
The following are nine main parts of the kitchen sink:
- Bowl or basin
- Faucet
- Drain and pipe
- Strainer
- P-trap
- Tailpiece
- Shut-off valve
- Water supply line
- Mounting hardware
If any issues come up, it must be with one of the above parts. Our general scenarios also revolve around these parts.
Scenario 1 – Leaky Drain

One of the most common, yet alarming issues is a drain leak. According to the EPA (Environment Protection Agency), an average household’s leak cumulatively amounts to 10000 gallons of water wasted per year.
But this alarming issue can be easily resolved in a short time with the right tools at your disposal.
Step #1 – Checking the Drain Pipe
Many times, we may not be able to identify the leaky area, but even a small hole, not visible to the naked eye, can cause a leak.
Instead of wasting time and energy, you can use the paper roll to spot the leaky area.
Take a clean paper roll, and roll it along the drain pipe connection. Once you find the area, try to tighten it with the help of an adjustable wrench. Do not put too much pressure on it, since it can break and cause more issues.
If it is a metal connector, you can use the wrench. If it is a plastic or PVC, you can use your hand to check the level of tightness.
Sometimes the culprit may not be in the drain pipe connectors. In that case, it can be either the whole pipe or the sink strainer.
Step #2 – Checking the Strainer

If the pipe seems old and rusty, it is time to change the whole drain pipe or check the strainer.
One of the best ways to do that is to fill ⅓ of the sink with water. Wait for five minutes and start to plunge the drain with the plunger. Be aggressive with the plunging.
Three to four plunges are enough.
Take the tissue and run it along the underside of the sink. Make sure to reach the strainer. If the tissue is moist, then the culprit is the strainer.
Check the strainer type. Usually, there are three types of strainers, which are a locknut (normal), a lock nut with a screw, and a bell washer.
The easiest and most convenient way to identify it is by checking with the manufacturer.
Once you identify the type, check if the connector is at fault or replace the plumber's putty if it came off the connector.
Use the adjustable wrench to tighten the connector, or apply a new sealant to create a water-tight seal.
Scenario 2 – Clogged Drain
Next to the leaky drain, a clogged drain is a common issue in the kitchen sink. It is also an issue that can be resolved easily in 5-10 minutes. All you need is baking soda and vinegar. However, before you put them into the drainer, you must remove excess water from the sink and drain.
A better option is to use a wet vacuum cleaner because it can help to suck all the water from the drain and prepare it for the next process.
After vacuuming the drain, take baking soda and vinegar in a 1:1 ratio: 200 gms of baking soda, and a little over 200 ml of vinegar is the perfect combination.
First, pour the baking soda into the drain and make sure it reaches deep.
You can even use a spatula to push down the baking soda. Then pour the vinegar into the drain.
For maximum results, put the stopper on the drain. This helps spread the chemical reaction evenly inside the drain.
Let the mixture sit for five to ten minutes. After that, pour one liter of hot salt water down the drain. Lastly, fill ⅓ of the sink with hot water and start plunging.
Make sure you are using the kitchen-specific plunger, and do not pull the plunger toward you. This can break the seal and render the whole process useless.
Once you can see the hot water being drained away, pour hot water again, but slowly. Keep plunging until the second batch of hot water is drained away.
Your drain is now clog-free!
Scenario 3 – Faulty Faucet

When it comes to faucets, you can do so much, since numerous small parts may not be available individually for replacement. A small DIY repair job might save you hundreds of dollars.
Most of the time, when faucets face water leakage, it can be either as small as sealing the stem properly or changing the whole faucet.
To access the stem, first, you need to place the stopper on the drain to avoid missing small parts during disassembly.
Next, shut off the water supply by using the shut-off valve under the sink to disconnect the supply.
Remove the cap with the adjustable wrench and loosen the screw underneath it. Now, the stem is exposed.
Use the wrench to loosen the stem and check the quality of the O-ring. Replace the O-ring to prevent leakage.
If that does not work, it is better to replace the whole faucet.
There you have it. These three are common scenarios that most of us face in our daily lives and can be repaired with simple tools at our homes.
Suggested Reads:
- How to Install a Freestanding Bathtub?- A DIY Method With 6 Steps
- Crack in Bathtub – How It Happens and How to Prevent It in 5 Steps
- Bathroom Sink Materials – All Important Things to Know in 2023!
FAQs
A crack in the kitchen sink can be easily resolved. First, clean the sink thoroughly with a cleaning agent. Next, sand the damaged area. Use the epoxy to apply on the sanded area and follow up with the paint.
The answer is: You can use both. There is not much difference between the two sealants. Plumber putty is more of a traditional sealant, while silicone sealant is for modern sinks. Both get the job done.
You can use the adjustable wrench and gently tighten the drain connector to make sure the sink drain is in its place.
Final Thoughts
The difficulty of repairing the kitchen sink depends on the diagnosis of the situation. If it's a leaky drain, clogged drain, or even a faulty faucet, you can repair it with simple tools and a guide.
You can also save a lot of money without having to rely on professional help.
That is the reason why we came up with this scenario-based guide.
If you are looking for sink accessories or even a new sink, you are in the right place. We have a great collection of sinks and accessories, and you can access them here.


